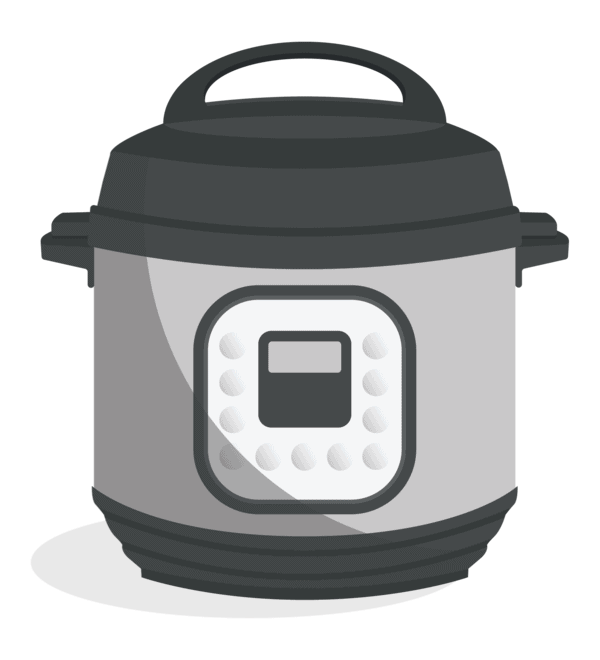

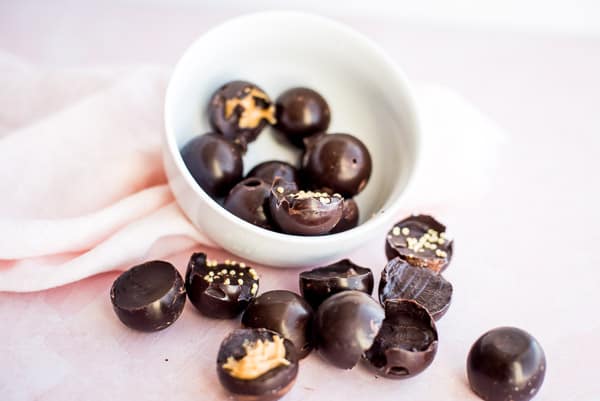
100% customizable homemade chocolates made special with your loving hands. This Instant Pot trick makes it easy and fun too!
Today is a big BIG day! Today is all about CHOCOLATE. Big day = Chocolate, I’m sure you all understand.
We’re not just talkin’ about any ol’ chocolate. Oh no. We’re talking about DARK chocolate, AKA the best kind of chocolate. Milk chocolate and white chocolate lovers stay where you are. You’re gonna need to hear this, too.
I could talk for hours about my love for dark chocolate. The health benefits, my favorite brand, how to consume it every day and feel good about it . . . yep, we’re covering all that today.
As recipe developing goes, there aren’t many recipes on my site that I can say “I’ve been making this almost weekly, the exact same way, for 4 years straight.” In fact with this recipe going live today, that makes 2 recipes that qualify for this kind of bold statement, the other being Instant Pot Yogurt.
Yogurt and chocolate. My priorities are dead on.
Quick story about how these chocolates came about.
Several years ago I took an online course called Go Sugar Free where I gave up any and all sugar including honey, syrup, and other sweeteners for over 60 days. You can read more about that in this post titled The Decisions that Change Everything, but in a nutshell, I learned so much and it changed the course of my life in many wonderful ways.
By the end of the course, I achieved my ultimate goal of being free from sugar cravings which was HUGE for me.
However, I found that without sweet cravings in my life, I craved bitter so much more. Specifically, bitter chocolate.
As I searched for dark, DARK chocolate bars to enjoy, I soon discovered that the darker chocolate bars get, the more boring they become. As in, no company was putting nuts, peanut butter, sea salt, or caramel in the darkest of dark chocolate bars. I needed to fix this asap.
I started by making homemade chocolate bars in the Instant Pot which you can find on page 154 of Master the Electric Pressure Cooker, but I wanted something more portioned and a way to create more flavors at once. Basically my own personalized box of healthy chocolates.
Well, I searched Amazon for chocolate silicone molds and when I found these bonbon style molds, I knew I had my answer.
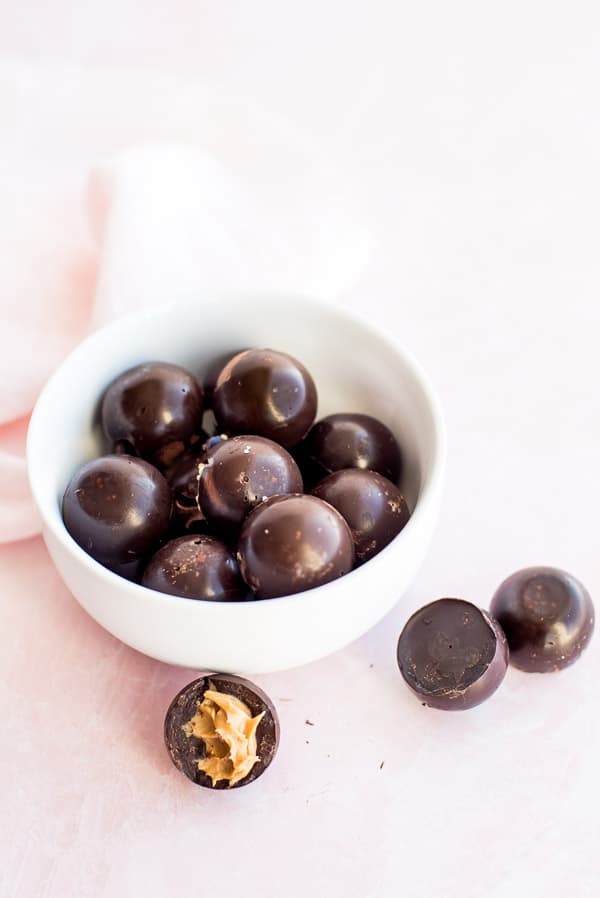
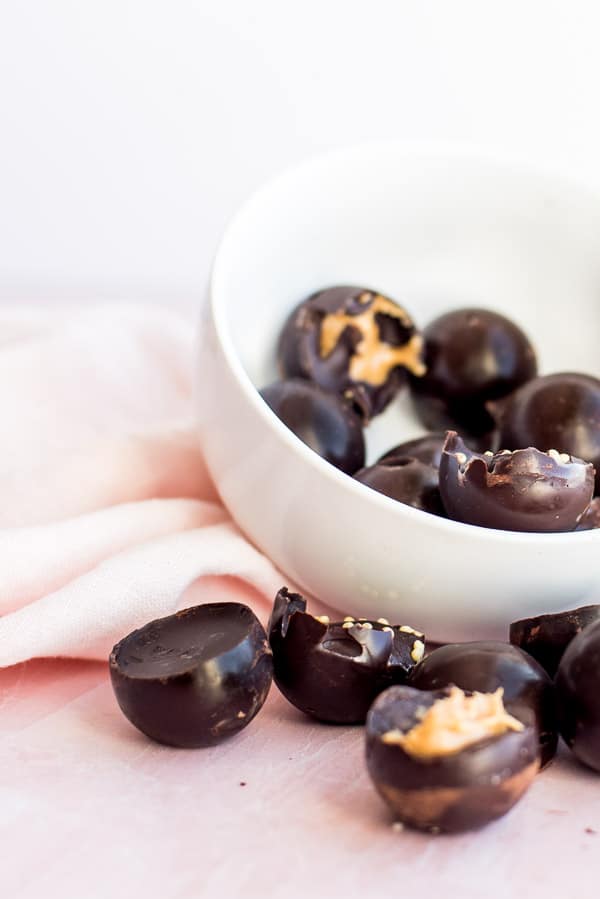
And the rest is history! For years now I have been making my very own chocolates with my favorite 90% Lindt Excellence bars and I enjoy them every evening after dinner.
They never get old, I love them with my whole heart, and even as dark as they are, with my special fillings, my kids love them (they also know to keep their little hands off of them, or else).
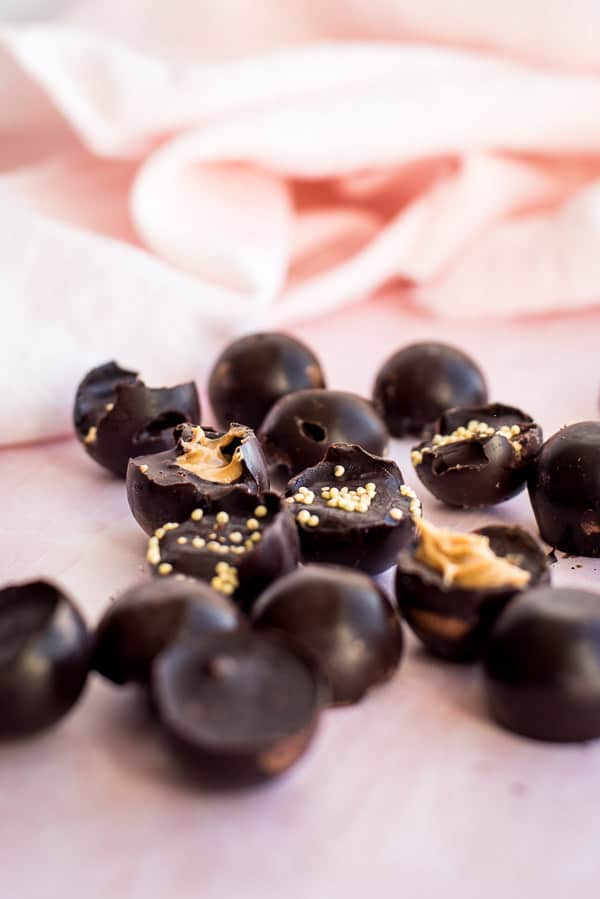
I’ve experimented off and on with different fillings and toppings over the years, but the 4 flavors I’m showing you today are my go tos, prepare for a salt/chocolate/texture theme.
- Salted Dark Chocolate Peanut Butter (or almond butter is also amazing)
- Salted Dark Chocolate Caramel (it’s actually date caramel, so no added sugar! See below for where to find it)
- Salted Dark Chocolate Crunch (and an ode to a Crunch bar except I’m using millet)
- Salted Peppermint Dark Chocolate (I add quite a bit of extract, my kids can smell the mint when I’m eating them!)
Let’s get started!
WHY YOU WANT TO MAKE DIY CHOCOLATES
- YOU pick your percentage of chocolate and YOU pick your add-ins. Have you ever seen how much companies charge to make you a customizable chocolate bar? You’re saving a bucket load doing this!
- It’s simple, fun, and clean when compared to the traditional method of melting chocolate and trying to pour it into each individual mold without getting chocolate EVERYWHERE
- Gifts! My kids have been making homemade chocolates and chocolate bars as gifts for Christmas, Valentines, Birthdays, etc for several years now. Not only is it a joy for them to customize each chocolate according to what they know about the giftee, but individuals that receive these cutely decorated boxes are thrilled with the one of a kind chocolates they are eating.
- When was the last time you ate a chocolate stuffed with toffee, mini chocolate chips, and marshmallows? Ummm, never!
- Or had a zebra chocolate (dark and white chocolate swirled) speckled with colorful sprinkles? You’re dying, right?
For today we are focusing on the chocolates I make for myself that are low in sugar and high in antioxidants, thanks to dark chocolate and healthy add-ins.
Before I jump in on how I do this, I’ll be the first to admit that I’m likely breaking many rules on how to make perfect chocolates. There’s no mention of “double boilers” and “tempering” here. This method is all about how to get my favorite chocolates in the world done in the least amount of time possible. If you are a professional chocolate maker, be kind.
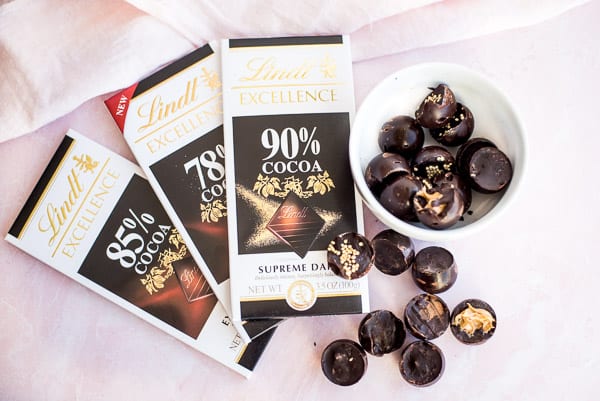
Since I’m stuck in my 90% chocolate ways, I reached out to Lindt and they shipped me out various percentages of dark chocolate. Just for you, I tasted them all. They all deserve a quiet, glorious melt in your mouth moment, but my heart will forever go to 90%. My kids happy danced for 78% and my husband found his happy place at 85%.
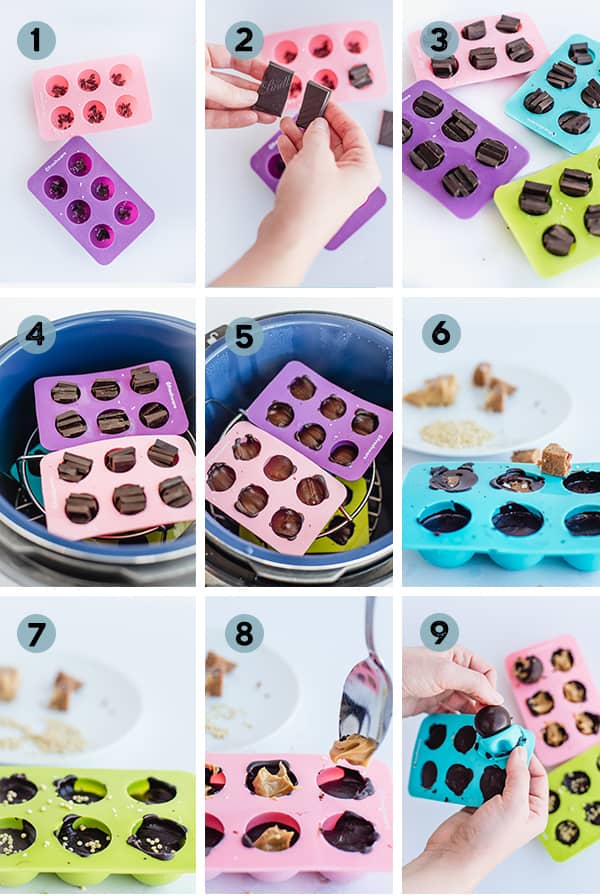
HOW TO MAKE EASY HOMEMADE CHOCOLATES IN THE INSTANT POT
- Add a pinch of kosher salt and cacao nibs in each hole of the silicone tray (optional, unless you want my honest opinion, then it’s not optional)
- Break one square of chocolate into 4 equal-ish pieces
- Squeeze the 4 pieces into one hole, repeat to fill your molds
- Place the molds on top of a trivet in the pressure cooker pot
- Cook for 2 minutes. Done! Perfectly melted chocolate, check!
- Add your favorite fillings like date caramels or
- All natural peanut butter (the PB from Thrive Market is soooo good!)
- Let the chocolates harden at room temperature, pop them out of the molds
- Voila! You just saved yourself a million dollars in homemade chocolates
VARIATIONS FOR HOMEMADE CHOCOLATE FILLINGS
For healthy options go with some of my favorites from over the years:
- Salted Nuts: pecans, cashews, peanuts, macadamia, etc
- Dried Fruit: raisins, pineapple, mango, craisins, date roll, etc
- Dried Spices: red pepper flakes, dried mint, cracked peppercorn, cayenne pepper, turmeric
- More Random Ideas: almond butter, peanut butter, Carob chips, uncooked quinoa or millet, peppermint extract, flaky salt, cacao nibs, Biena salted chickpeas, etc
My kid’s favorite toppings however go like this:
- Chocolate chips of every variety, sprinkles, toffee bits, Nutella, crushed Oreos, marshmallows, graham crackers, M&Ms, caramel bits, cinnamon bears, and beyond
BEST DARK CHOCOLATE TO BUY
Feel free to pick whatever add-ins you like, but I have a strong opinion on what type of chocolate you should use.
I’ve used every chocolate bar, baking chocolate, chocolate chips, bark, melting chips known to mankind and the Lindt Dark Chocolate Excellence bars are the ONLY bar that will melt into a perfect pool of chocolate for me. Trust me on this one. I faithfully stalk their website for when there is a good sale, then I load up! Every now and again they go 50% off and I order $100 worth. Not even kidding right now. Don’t tell my husband . . .
Nothing else that I’ve tried would ever completely melt. Without a full melt, my chocolates were just lumpy, weirdly textured, disappointing chocolates.
Despite my many attempts at research, I have no idea of the chemistry behind this, but the Lindt Excellence bars 70-90% are definitely the way to go.
HEALTH BENEFITS OF DARK CHOCOLATE
Dark chocolate is one of the very few dessert foods that can legitimately be considered healthy. This is largely due to its high levels of antioxidants in the form of polyphenols, flavanols, and catechins. Antioxidants are shown to protect the body from free radical molecules that may harm the healthy cells in the body leading to problems such as early aging, cancer, etc. I love this kind of knowledge! If you do too, read this article, Definition and Effects of Free Radicals.
The darker and less processed the chocolate, the higher the levels of antioxidants.
Studies of dark chocolate have shown that regular intake can decrease heart disease, improve brain function, elevate mood, and possibly protect your skin. For more info on this read 7 Proven Health Benefits of Dark Chocolate.
DARK CHOCOLATE NUTRITION: DARK CHOCOLATE VS MILK CHOCOLATE
How does dark chocolate compare to milk chocolate? Let’s take a look
40 grams of 90% dark chocolate contains 240 calories, 22 grams fat, and 3 grams of sugar. The first 3 ingredients of dark are chocolate, cocoa butter, and cocoa powder.
42 grams of milk chocolate contains 230 calories, 13 grams of fat, and 22 grams of sugar. The first 3 ingredients of milk chocolate are sugar, cocoa butter, and milk.
Interpretation: Dark chocolate contains more fat because it isn’t diluted with milk, but only has a few more calories than milk. Dark chocolate contains much higher levels of antioxidants with a fraction of the sugar.
SO . . . IS DARK CHOCOLATE HEALTHY?
I’m gonna give that question a solid YES! Obviously eating it with abandon is going to result in negative effects but an ounce or two each day has been proven to be a positive addition to a healthy diet.
Now that you know how to make your own chocolates and feel awesome about making chocolate an essential addition to your every day, go pick up some Lindt Excellence bars and some silicone trays and get your Willy Wonka groove on!
I love these chocolates more than I can even express. I pack them along when I eat out for dinner, I stuff them in my carry on when I travel, and I want to cry when I’m stuck in a sketchy town in Hawaii without a decent dark chocolate option in sight.
Make some today for that special someone in your life. Make sure and hide some in the back of your pantry for later as well. They make the worse days so much better.
Enjoy!
TOOL/INGREDIENTS USED TO MAKE HOMEMADE CHOCOLATES IN THE INSTANT POT
- Instant Pot
- Chocolate Truffle Silicone Molds
- Lindt Dark Chocolate Excellence Bars
- Date Rolls/Date Caramel – I find these for about $5 near the produce area next to fresh Medjool dates. If you’re buying them on Amazon, this Sweet Gourmet or Sincerely Nuts brands are the best price I found. The one-pound packages last me a very long time.
MORE HEALTHY DESSERT RECIPES
- Instant Pot Homemade Chocolates
- Instant Pot Healthy Peanut Butter Cups
- Instant Pot Hasselback Apples
- Instant Pot Apple Pie
How to Make Homemade Chocolates in the Instant Pot

Completely customizable chocolates made with ease in the Instant Pot
- Prep Time: 15 minutes
- Cook Time: 2 minutes
- Total Time: 25 minutes
- Yield: 24 chocolates 1x
- Category: Dessert
- Method: Pressure Cooker
- Cuisine: American
Ingredients
- 4 silicone chocolate molds with 6 cavities each
- Lindt Excellence Chocolate bar 70 – 90%, broken into 24 individual squares
- cacao nibs
- kosher salt or coarse sea salt
Fillings
- date caramel – chopped into pieces about the size of a black bean
- uncooked millet or quinoa
- Peanut Butter (the all natural, sugar-free, runny kind)
- Mint extract
Other filling options: macadamia nuts, pecans, peanuts, almonds, raisins, almond butter, shredded coconut, etc
Instructions
- Add a small pinch of kosher salt to each cavity, followed by a pinch of cacao nibs.
- Break 1 square of chocolate into 4 pieces and squeeze it into one cavity. Repeat with the rest of the chocolate squares.
- Add 1 cup of water to the pressure cooker pot and place a short trivet inside. Top with two of the silicone trays.
- Place a taller trivet over the trays and top with the remaining two trays.
- Note: If you don’t have trivets that will work for this, just cook two trays at a time.
- Secure the lid and turn pressure release knob to a sealed position. Cook at high pressure for 2 minutes.
- When cooking is complete, use a quick release.
- Before taking the trays out of the pot, use a paper towel to dab away any water that has collected on the trays so it doesn’t run into the chocolate (a little condensation may have gotten into the chocolates, that’s fine).
- Place trays on a cooling rack.
- To one tray, immediately add a pinch of millet to the top of the chocolate. Shake them gently to help the millet just barely settle into the chocolate.
- To another, push a piece of date caramel into the center.
- To another, add a drop of peppermint extract to each chocolate. A small pipette or small measuring spoon makes this process easier.
- For the final tray, get a scoop of peanut butter on a spoon. Use a second spoon to scrape small dollops of peanut butter into the center of each chocolate.
- Let sit at room temperature until hard. This can take anywhere from an hour to four hours depending on the temperature in your home.
- After hardened, pop out your creations and enjoy!
- Store chocolates in an airtight container at room temperature. The first 3 or 4 days have the best “melt in your mouth” feel.
Notes
- Use Lindt Excellence Chocolate bars to achieve perfectly melted chocolate every time
- If using a different brand of chocolate, be aware that it may not melt into a silky, smooth puddle like the Lindt Excellence bars, but it can still work! Just use a small knife or toothpick to smooth the chocolate into the mold once it is melted
- If you’re concerned with condensation that might drip into the chocolates, you can definitely cover them with foil. I don’t notice any difference in the final product so I don’t bother with the extra step
- Placing the chocolates in the freezer will harden them quickly. However, I felt like this gave the chocolates a dry texture so I prefer to let them sit at room temperature to harden
- As written, these chocolates are a healthy chocolate treat with minimal sugar and wholesome fillings. For a more traditional dessert chocolate try freezing small balls of Nutella, cookie butter, egg free cookie dough, buttercream frosting, etc and place that in the center after the chocolate is melted.
- Other “sweet treat” mix in ideas include white chocolate chips, marshmallows, toffee bits, crushed cookie pieces, sprinkles, etc. Personalize the chocolates for whomever you’re creating them!


I am keto so I was wondering about the millet and/or quinoa. Can I just omit this? Thanks for great ideas!
Cheryl, for sure! This is a very customizable recipe. Add whatever you like!
I made these chocolates at Christmas and had rave reviews. One thing I noticed, though, is that when I first took them out of the mold, they were shiny and looked so pretty. The next day, there was a whitish film on them. What would cause this and how can I keep it from happening when I make them for Valentines Day?
Joan, I typically see this happen at the 5-day mark after I make them, so I would make them the night before. The white film is called chocolate bloom. They are still perfectly fine and delicious to eat, but I’m sure it has to do with the cooking process not being a perfectly controlled enivronment for tempering chocolate (if you compare it to professional chocolatiers). Storing them in a sealed container afterward may also help. What brand of chocolate did you use? This doesn’t happen to me as much when I use Lindt.
I used the Lindt chocolate as you suggested. Mine only took until the next day to get the white film. Would it have anything to do with chilling them instead of letting them set at room temperature? I was making quite a few for gifts and wanted to speed things along. I’ll try it again without chilling them. Also, have you ever tried using the white chocolate? I’m not sure whose son I have, but he does not like chocolate! Thanks!
Joan, Yes, that could definitely be it. I’m looking at some I made last Wednesday and they still look amazing. White chocolate doesn’t melt as smoothly, but I just smooth it with a knife. Let me know if you try again!
I’m no longer certain the place you’re getting
your info, but great topic. I must spend a while finding out more or figuring out more.
Thanks for fantastic information I was looking for this information for my mission.
What do you use as your second trivet?
Karin, I have a couple of trivets that are different heights that work really well. I’ve used mason jar rings before to make space between things as well so that works too!
Do you cover the molds in the IP so the chocolate does not get wet?
Pamela, no, I never have. If you wanted to take the extra step, I don’t think it would hurt since there is sometimes water that trickles in, but it’s never ruined the chocolate for me, so I don’t bother.
Marci, you didn’t mention one major plus in dark chocolate, and that is iron! I was eating too much of my Instant Pot homemade yogurt and fruit, got busy and distracted, and had what I will call a spell — sort of an out of body experience — so my family rushed me to emergency, 10 minutes away. Turns out I almost died because as they told me, I was walking around with only “half the required blood (i.e. red blood corpuscles!)” It was way low, and I required a major blood transfusion. I had to go on a heavy iron diet and when looking at the nutrition info on everything at Costco discovered how high the iron is in dark chocolate. That’s how I got through the next weeks without having to eat much meat or beans and rice! Definitely kept my spirits up. As someone said the other day, you can make almost anything in an Instant Pot (except ice cream!) but actually, you can use it to make the condensed milk in no-churn ice cream. By the way, I might try the toaster oven method for chocolate in my newest Instant Pot appliance, the Vortex 10 qt Air Fryer. Sorry, Mealthy Crisper Lid — I gave you away to my daughter-in-law! I will definitely use my egg bites molds for chocolates in the Instant Pot, though. Thanks for your recipes. I recommend them to everyone, and all my gifts of an Instant Pot to various kids and grandkids are accompanied by a recommendation for your recipes.
Sharon, oh my, what an experience that must have been! I’m so happy to hear that you are doing better! I’ll also admit that I’m VERY happy to hear that chocolate is actually a good source of iron. I honestly didn’t realize it had a substantial amount to actually do much good. So cool! And I’d love to hear your thoughts on the Vortex, I’ve had my eye on that. Prayers of healing coming your way!
Could silicone egg bite molds be used instead of candy molds?
Nita, Yep! It works great actually.
The recipe club (meet once a month with themed dishes dishes-try out new and old favorites and share the recipes) loved the chocolates, all 4 dozen. I cut up pumpkin pie spiced date roll for some of them. Next month is “ancestry dishes. ” I am going to make Thomas Jefferson’s Sweet Potato Bread (biscuits/muffins).
Thank you for all your recipes and tips.
Jerry, I’m so thrilled to hear that! I love the pumpkin spice date roll idea. Your recipe club sounds like a blast, I would love to do something like that.
Are cacao nibs similar to chocolate chips?
Susan, They are quite different. Cacao nibs are crunchy and unsweetened and won’t melt into the chocolate. I love them for their crunchy texture in the chocolates.
On this rainy, chilly, foggy Sunday afternoon I tried this recipe and it definitely put a bright spot in my day! For my test I only made a dozen using the 85% bars. I filled the molds with peanut butter, cranberries and coconut. Next time I would chop the cranberries but all three are winners! My “fill” skills need a little work but how fun to create different yummy combinations. Thank you for your creativity, I enjoy your blog and your cookbooks!
Barbara, Aren’t they wonderful!? I’ve been making them for such a long time now, I even pack them along with me on trips so I have a sweet treat on hand since the real sweet stuff doesn’t make me feel so good. I’ve done all of those flavors and love them so much! I’m glad they could brighten a gloomy day!
This is a great idea. I have been making my chocolates in a toaster oven. Now I can do either.
Kath, never thought of that! I had tried in the microwave but it kept burning the chocolate. You’ll have to let me know which method you prefer.
I tried the IP method. It will take some getting used to, I made a mess of the molds and I wasted chocolate. When I make the chocolates in the toaster oven, I don’t use a mold. This is good for more flattened shapes such as chips. Your method works better for rounded, molded shapes. For the toaster oven method, I melt a chocolate bar on a parchment lined baking dish, such as a glass meatloaf pan. I plunk the entire chocolate bar in the dish and put it in the toaster oven. It only takes a few minutes to melt the chocolate at 325 degrees in the toaster oven. I remove the chocolate with the parchment to a cutting board, let it cool just enough to score it, and then cool it in the fridge. I have used cookie cutters to make shapes and put sprinkles on top. Sometimes I use bakers chocolate and add my own sweetener, such as xylitol or monkfruit. It is a little crunchy, unless I reheat the bakers chocolate after I add the sugar. If I want to dissolve the sugar I add it to the melted chocolate, I put it back in the oven for a few minutes, remove it, give it a stir to see if the sugar is dissolved, then I let it harden. For some reason it does not work if I add the sugar to the chocolate the first time. I use this method to make chocolate chips. Good luck. Your recipes are wonderful and inspirational.
Kath, I found that whole process so fascinating. So you’re kind of making a bark, right? What a fabulous idea! The crunchy sugar bites sound amazing, I would totally leave those crunchy, maybe combine it with flaky sea salt for a sweet/savory crunch combo. Thank you for all that good info!
Yes, it could be considered a bark, but this is much easier. For a couple of years I searched for a recipe for chocolate chips, but they were all too difficult. This recipe only requires one dish, a chocolate bar, parchment, a fork to mix add-ins, and a sharp knife for scoring. The chocolate is melted in the heat proof dish, removed from the oven and then the extras are stirred in. No muss, no fuss. The dish doesn’t have to be washed afterwards since the parchment keeps it clean. Since I score the chocolate vertically and horizontally when it has cooled, I don’t use aluminum foil, it’s too easy to tear; the parchment is sturdy enough to survive the scoring. I also like the crunchy sugar. Use 1/4 cup sugar for a 4-6 ounce bar of baker’s chocolate. For some reason the chocolate does not bloom. I’m a lazy cook and I can’t be bothered chopping up the chocolate bar, so I just plop the entire bar in the parchment lined baking dish.; it melts very quickly. This could be done in a regular oven. I use heat proof glass. I don’t know if stainless steel heats faster. The size of the dish will affect the thickness of the chips or cut outs. I use a bigger dish for thinner chips, and a smaller dish for thicker chips (or bark).
These look fantastic! I ordered my molds and a set for a friend last night. Can you link to the boxes and anything else you use when you are giving them as gifts?
Lyn, Oh you will love this. It’s my “treat” for the past few years. I just love good, bitter chocolate! I’ve only ever bought the chocolate boxes at a local kitchen supply store. I’ll get on Amazon here in a bit and see if I can find something comparable.
I tried searching on Amazon and the only thing I could find was cupcake and pie boxes. I tried searching it several different ways and just kept getting big boxes. I like the white ones with the cutout window in the top. I’m sure there will be some cute Valentine options at supermarkets though.
Who……knew????? I’ve looked at your chocolate bar recipe in your cookbook I have here and have been tempted…but these little beauties are even MORE tempting. I mean really…..they’re small and round and just calling your name…..is that a good thing or a bad thing? Either way they look amazing, Marci-and so many possibilities! I’ve found myself more drawn to dark chocolate these days than others…even when making cookies with chips, I use dark chocolate chips pretty much exclusively in them. The others taste too sweet to me now.
Carol, OH yes, I much prefer these little round beauties. I will proclaim dark chocolate a health food till the day I die so I’m going to say it’s definitely a good thing! Once you develop a taste for dark chocolate, milk is never as good!
Dark dark chocolate is one of the fee desserts I truly enjoy. My sweet tooth is minimal and runs toward dark bitter chocolate and nuts, pure and simple. So this is a dream idea in the IP for me. I have made almond bark many times with dark chocolate and nits and seeds only. I do not have bonbon size molds, but I do have the larger silicone egg/muffin molds. Is this way too big to use?
Oops. Phone typing mistake. Meant one of the FEW desserts
Connie, we speak the same language! I love a deep dark chocolate, pecans and macadamia nuts make it even better. You have me curious with those molds now. It would work for sure, I’d put at least 2, maybe 3 squares in them. That would probably make the cutest shape of chocolate!